
Snow Photography Tutorial
My first attempt at snow photography went fairly well. I attached an 18-55mm f/3.5-5.6 IS lens to my Canon Rebel xti and headed out for a neighborhood walk. Checking my camera manual for tips, I realized a camera’s light meter can be fooled by large expanses of white; producing snow that looks gray. The goal was to find subjects with a bit of color and capture snow that looked white.
- The weather was mostly cloudy and many shady areas are on my walking route, so I set ISO to 400 (on the back of the camera).
- Because a tripod was not being used, IS (image stabilization) on the lens was set to ‘on’.
- Automatic Focus mode was set to ‘one shot’ (on the back of the camera), because still objects would be the subjects of the photos.
When preparing for your snowy photo shoots, the basic settings above may need to change depending on available light, the use of a tripod, and your choice of subjects.
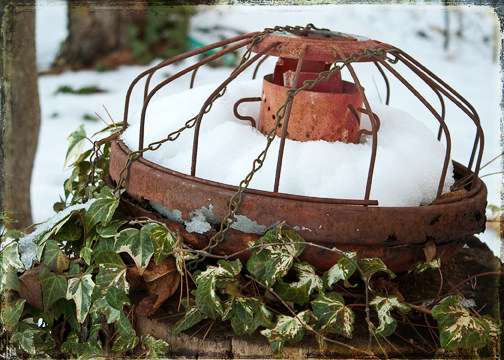
After the photo shoot, I processed the RAW photos in Lightroom and Photoshop. Art Grunge#4 photo texture from Shadowhouse Creations was used to give the photos a bit of texture and a border. My tutorial on using photo textures.
Step by step techniques for your snow photography:
- First, turn the mode dial to aperture priority (AV) so you can control the depth of field for each photo. The camera will set the shutter speed automatically.
- To help achieve white snow, set the exposure compensation by pressing the shutter button halfway, then pressing the AV button on the back of the camera. Watch the viewfinder on the back of the camera and turn the main dial to the right to set positive one third stop. During your photo shoot, you can experiment with higher settings, possibly up to + one or two full stops.
- On the back of the camera, set the metering mode to ‘partial’. This setting will allow the camera to read the light from a small area of the scene.
- Next, go to the menu and set automatic exposure bracketing (AEB) to maximize your chances of getting a good exposure. Using AEB provides a standard exposure, a darker exposure, and a lighter exposure. Then set the shooting mode to ‘continuous shooting’, so you can rapidly take the three different exposures by holding the shutter button down.
- When you find subjects you want to photograph, point the center focal point at a neutral gray area in the scene and take a meter reading. While still holding the shutter button halfway, press and hold the * button (exposure lock) with your thumb. While continuing to hold the * button, release the shutter button, aim your camera at the subject, and compose the shot. Press the shutter button halfway to focus; then all the way to take the shots.
- You can also experiment with the techniques above by setting exposure compensation (#2) to a negative setting, then metering (#5) from the snow instead of a neutral gray area in the scene.
Exposure compensation, auto exposure bracketing, and exposure lock can result in much whiter snow than you can achieve with your camera’s auto setting!

January 18, 2011 at 1:15 pm
Karen, these photos are simply exquisite. I really appreciate your explaining the details of the shots. Instead of white snow, I’ll have to practice with white sand as we will be heading to the beach for the next three weeks. Yes, it is cold in Florida but the sun does shine occasionally.
January 18, 2011 at 4:01 pm
Thank you, Joyce! Yes, the white sand will be the perfect place to practice with exposure compensation, exposure bracketing, and exposure lock. Have fun with your family!
January 24, 2011 at 8:33 pm
What gorgeous photos, Karen, it looks like you know your way around your camera so well. Do you still have snow down there?
January 25, 2011 at 2:01 am
Thanks, Cait! Actually, I don’t know my way around my camera since I’m still a beginner and have not encountered a lot of unusual lighting situations. But I am learning and have had some luck too! The snow is gone now, but amazingly it remained in the shady areas for over a week.